Difficulty
Advanced
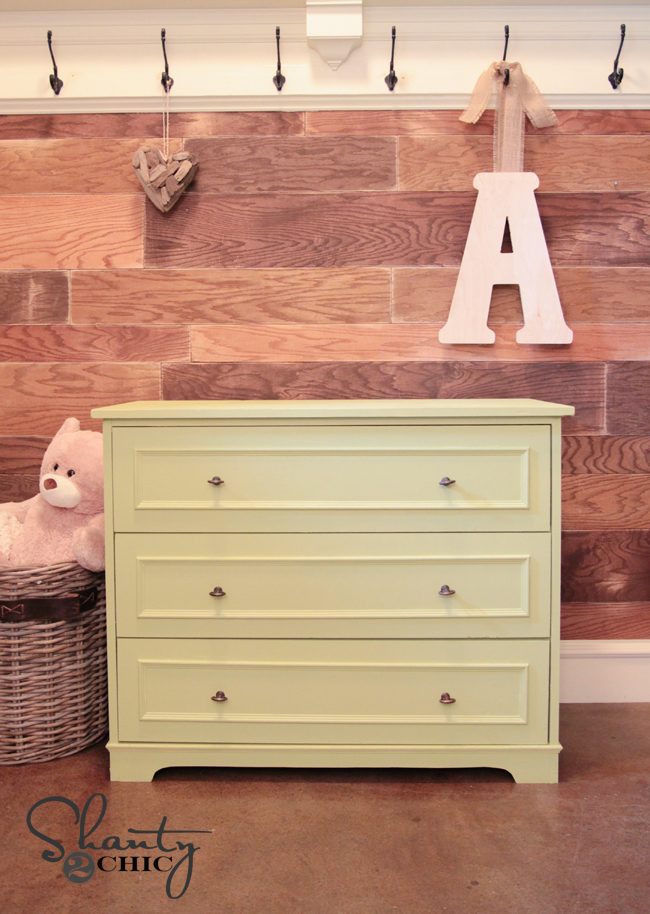
Free plans to build a dresser or changing table (with topper!) from Ana-White.com! Inspired by Pottery Barn Kids Fillmore Dresser or Changing Table.
About Project
Hi Everyone!!!
So happy to debut brand spanking new plans for you today!!!
My friend Whitney from Shanty2Chic needed a baby shower gift. Since buying a $1000 changing table was just too much, Whitney DIYed a new changing table with three large drawers!

Here's from Whitney from Shanty2Chic:
"I love my latest furniture build I am sharing today. My first babysitter I used with my oldest three girls has grown up and is now having a baby of her own. I thought it would be so fun and very full circle to make her a changing table for the baby! She wanted drawer space and something that would work as a dresser after she was out of diapers. I found great inspiration on Pottery Barn Kids and teamed up with my sweet friend Miss Ana White to build her this changing table! The cost was just around $200 which is way better than the $1000 they were asking for theirs!"
Whitney, thank you so much for asking me to draw up plans for you! Of course, the plans follow!
But before we get to the plans, please take a second to READ MORE about building this changing table or dresser, and see lots more photos and finishing details over at Shanty2Chic.
Enjoy the plans!
XO Ana
Preparation
1 - 1x10 @ 10 feet long (for drawer faces)
26 feet (I'd buy a little more to be safe) of 1x6 or 1x8 boards for drawer boxes
1 - 1x4 @ 8 feet long
4 - 1x2 @ 8 feet long
2 - 1x3s @ 8 feet long (for topper - can also use 1x4s here)
1 sheet of 3/4" plywood
1 sheet of 1/4" plywood
36 feet of moudling for drawer faces/top edge and bottom edge
3 sets 16" euro style drawer slides
6 knobs
1 1/4" pocket hole screws
1" and 1 1/4" finish nails
wood filler or edge banding to finish plywood edges
2 - 3/4" plywood 18" x 32 3/4" (sides)
1 - 3/4" plywood 18" x 40" (top)
2 - 1x4 @ 38 1/2" (footers)
4 - 1x2 @ 38 1/2" (top supports and between drawer face supports)
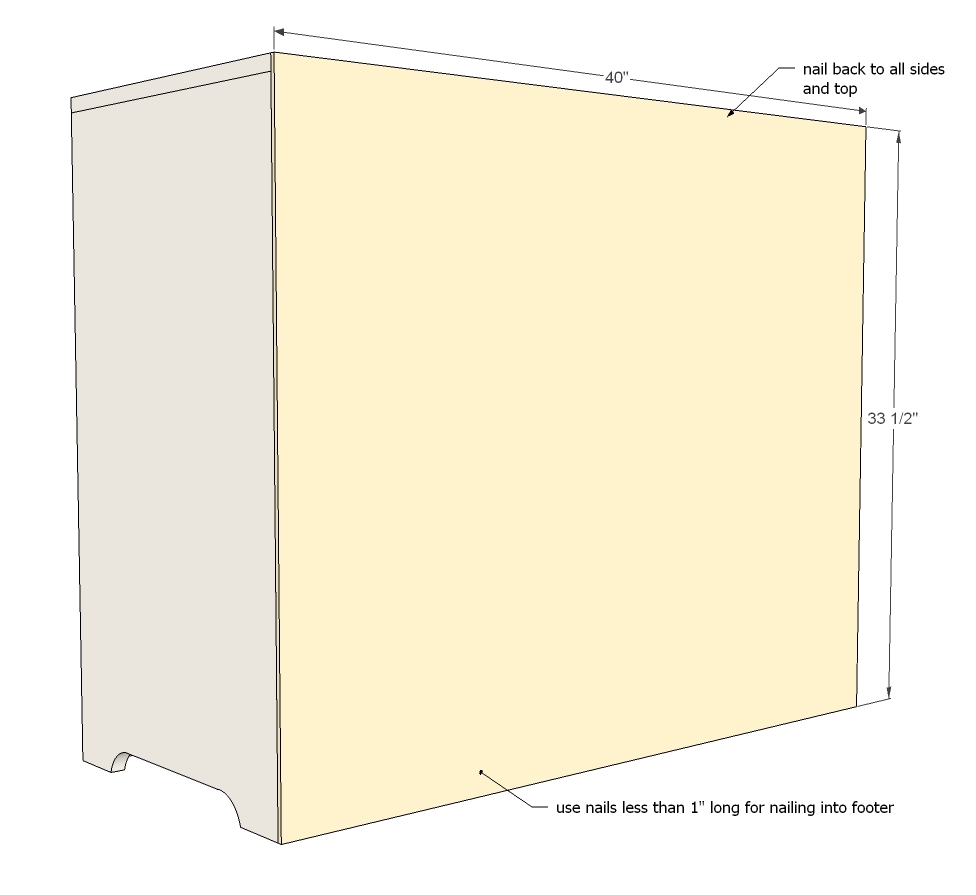
1 - 1/4" plywood @ 40" x 33 1/2"
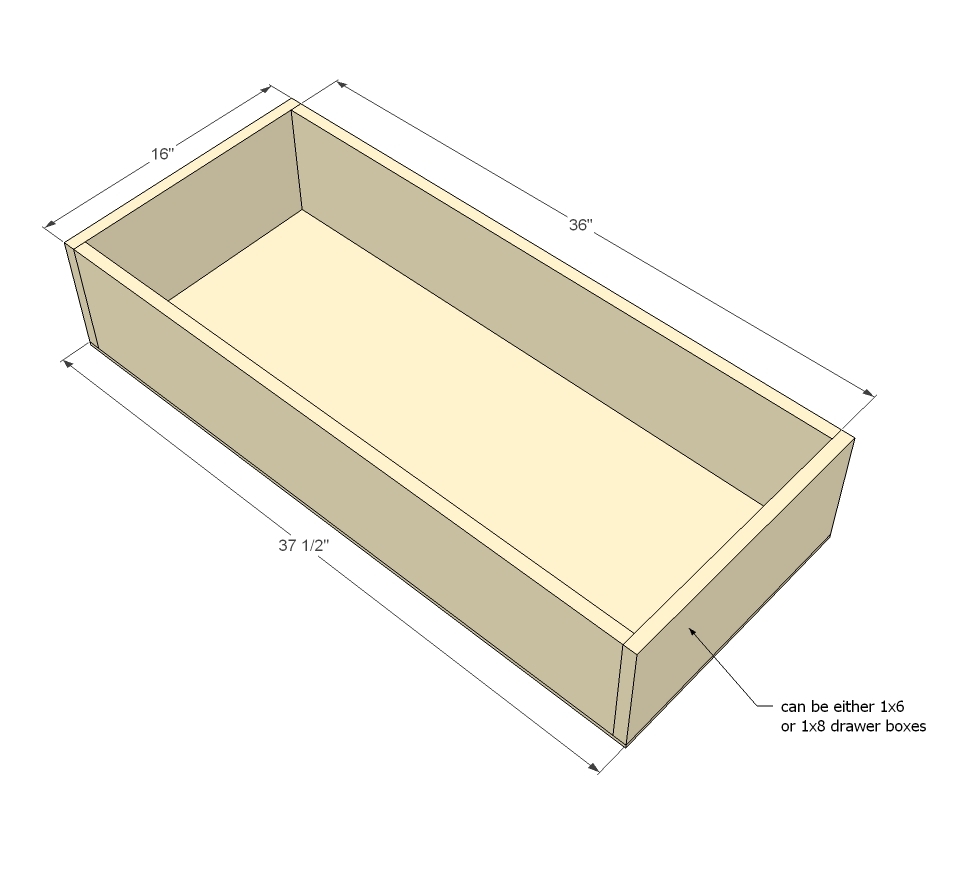
DRAWERS - can be made with 1x6 or 1x8 boards
6 - 1x6 @ 16" (sides)
6 - 1x6 @ 36" (front/back)
3 - 1/4" plywood @ 16" x 37 1/2" (bottoms)
3 - 1x10 @ 38 1/4" (drawer faces)
TOPPER
3 - 1x3 @ 16"
2 - 1x3 @ 39"
Please read through the entire plan and all comments before beginning this project. It is also advisable to review the Getting Started Section. Take all necessary precautions to build safely and smartly. Work on a clean level surface, free of imperfections or debris. Always use straight boards. Check for square after each step. Always predrill holes before attaching with screws. Use glue with finish nails for a stronger hold. Wipe excess glue off bare wood for stained projects, as dried glue will not take stain. Be safe, have fun, and ask for help if you need it. Good luck!
Instructions
Step 1
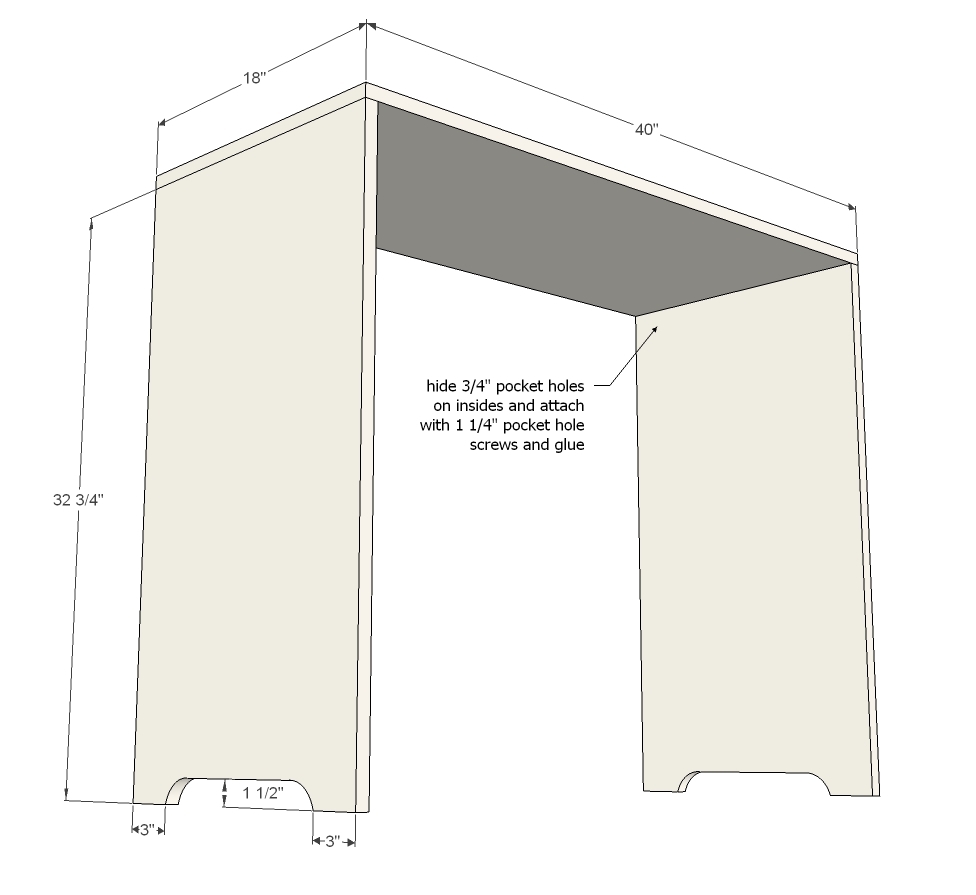
Start by attaching the sides to the top. I definitely recommend 3/4" pocket holes and 1-1/4" pocket hole screws here - the joint is just so much better and is hidden and so much easier to make - and since this project doesn't have a face frame, it will help keep the project square.
If you are cutting out the base, take a second to jigsaw the sides out now.
NOTE: For a stained finish, you will want to add edge banding to the front edges of the sides before assembly.
Step 2
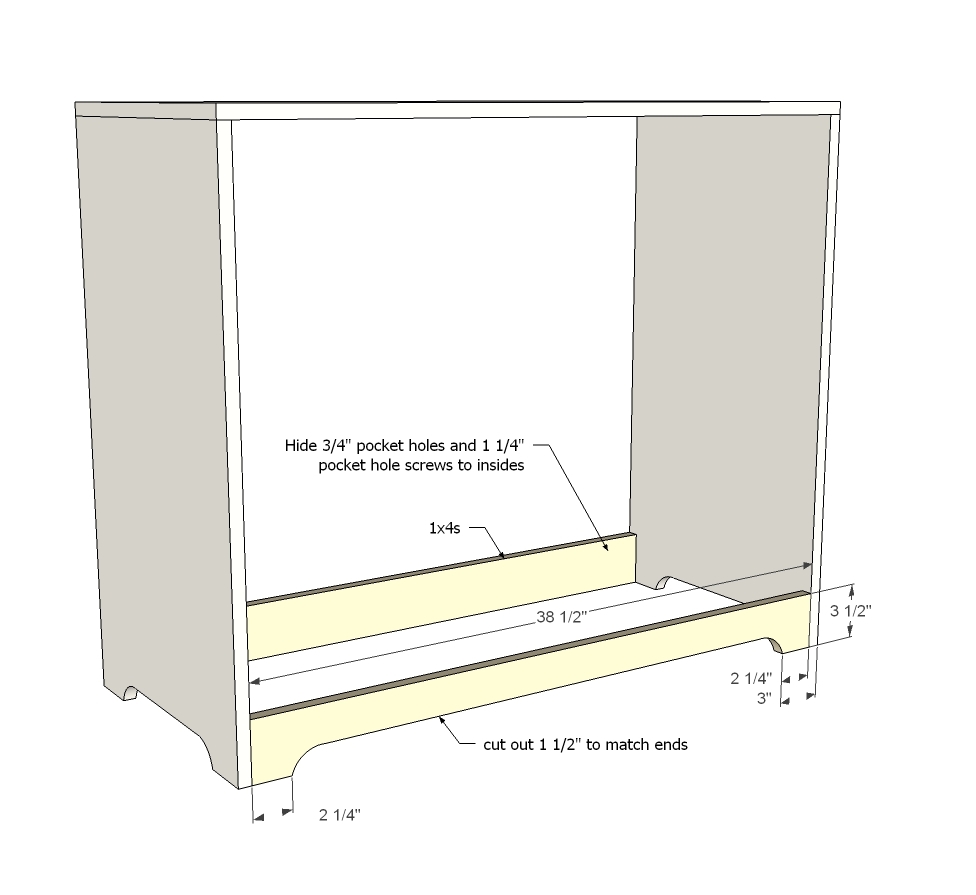
Then add the front and back supports along the base. We could have done a bottom shelf instead, but that adds a ton of weight and extra material, so I went this route with the plans.
Step 3
Now attach the top trim - this one just adds a little decoration and a little extra support on top.
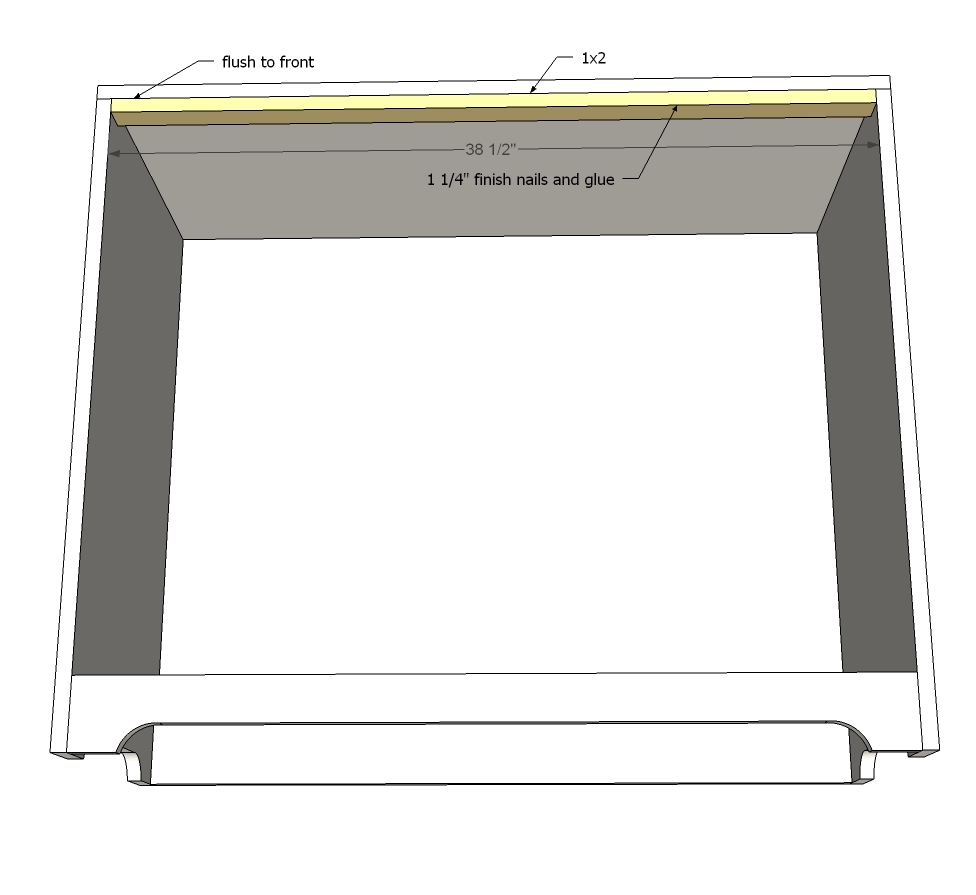
Step 4
These guys go between the drawers so when you look at the project from the front, there's no air gaps in between. Also, they hold the drawers in place when installed.
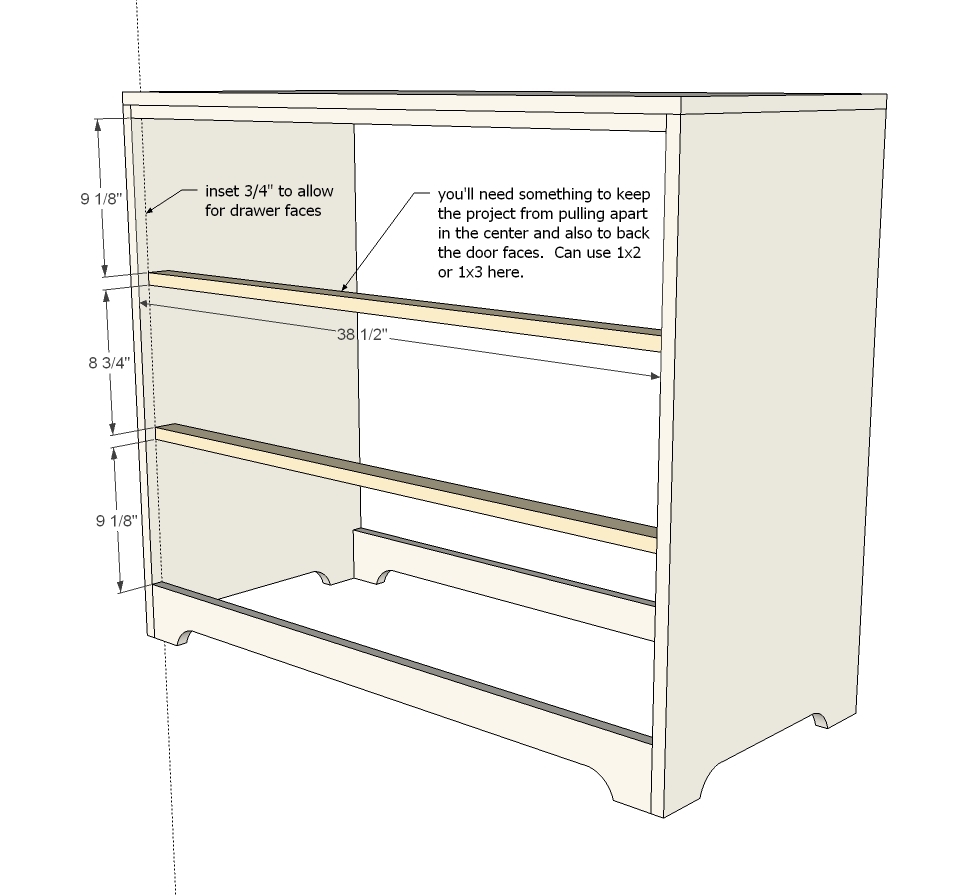
Step 5
Step 6
Drawers need to be installed inset 3/4" to allow for the drawer face, installed in the lowest possible position above the 1x2s. Use a square to help you install the cabinet members.
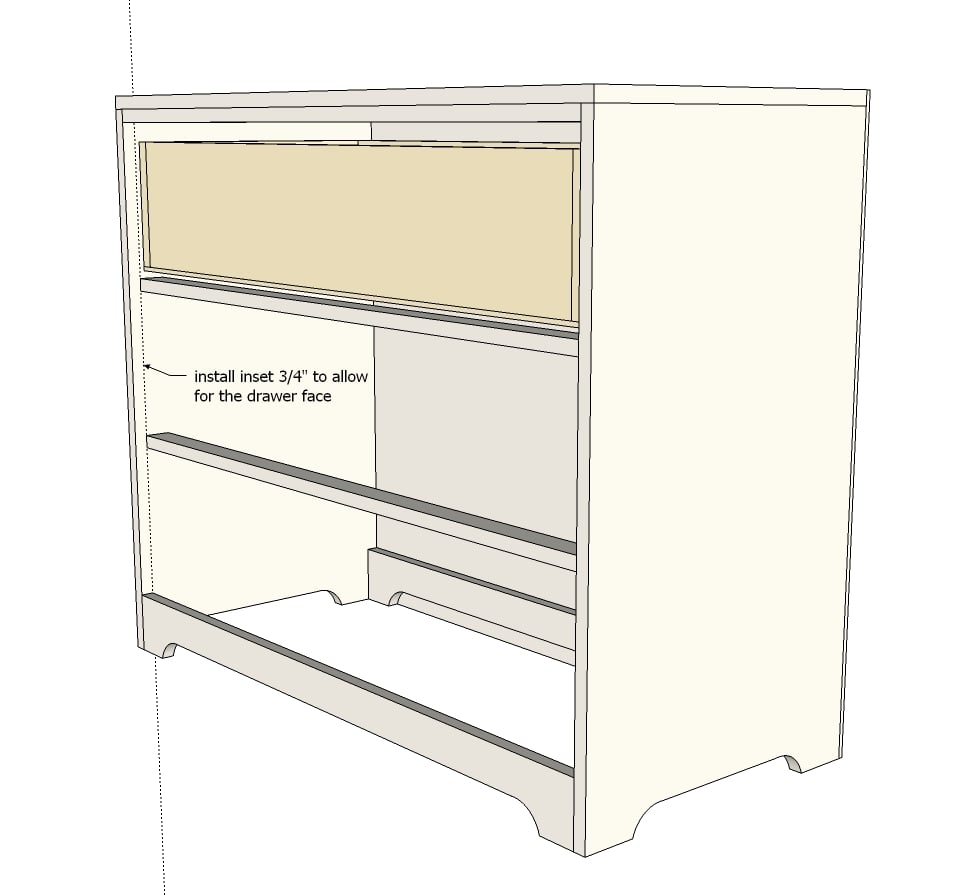
Step 7
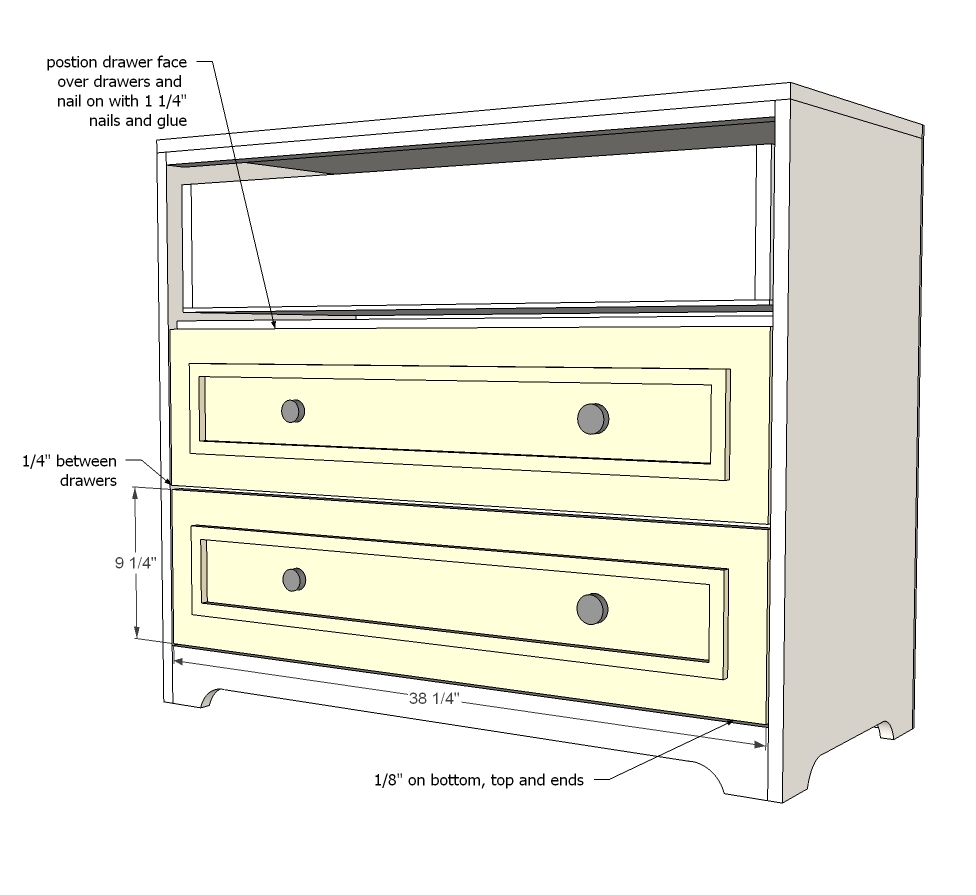
Attach drawer faced to fronts of drawers, allowing for a 1/4" gap in between drawers. You can use a nailer and 1-1/4" finish nails to attach, then open the drawer and add a few screws from the inside.
Another tip is to install the knobs first so you don't have to drill through double thickness for the drawer fronts (as most knobs only have a bolt designed for 3/4" thick drawer faces).
Dress the drawers up with trim or moulding if desired.
Step 8
The back could have been installed at any time, but I like to leave it off until after the drawers are installed just to make reaching inside easier. The down side is the back does help keep the project square - so if your project is not square, it may make sense to put the back on earlier (around step 3).
Step 9
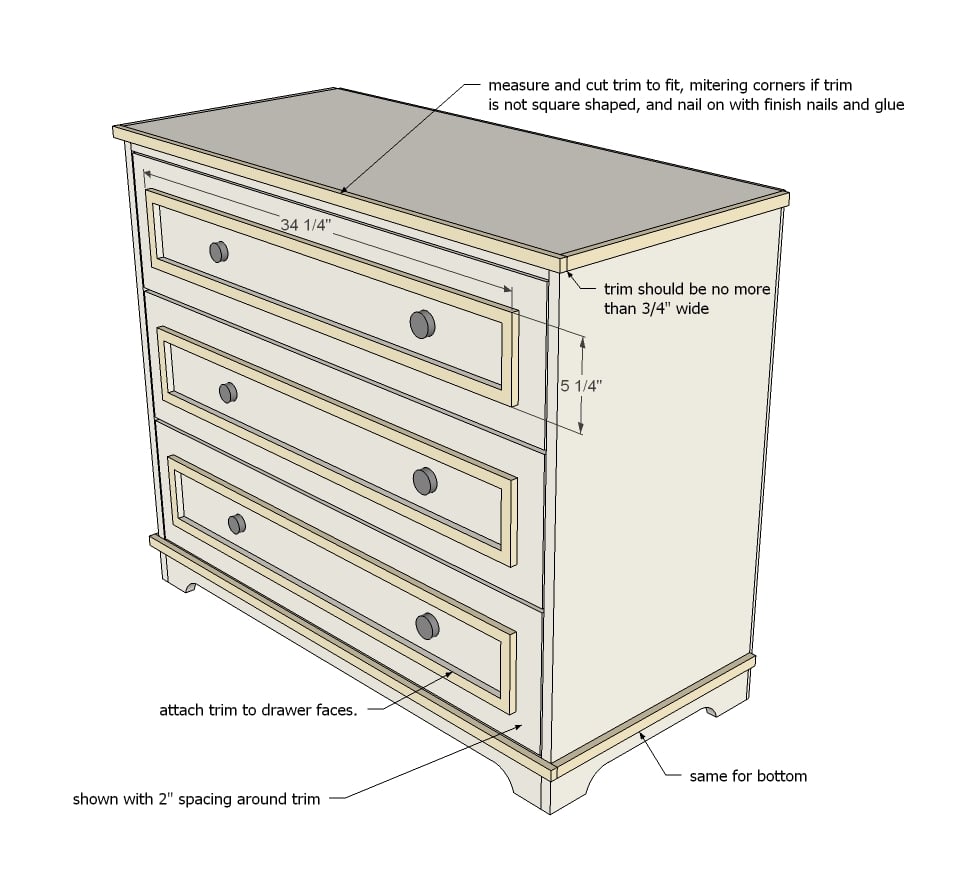
Trim the top and bottom edges out to add interest and cover exposed plywood edges on bottom. If you are using a shaped moulding, you will need miter the corners.
Step 10
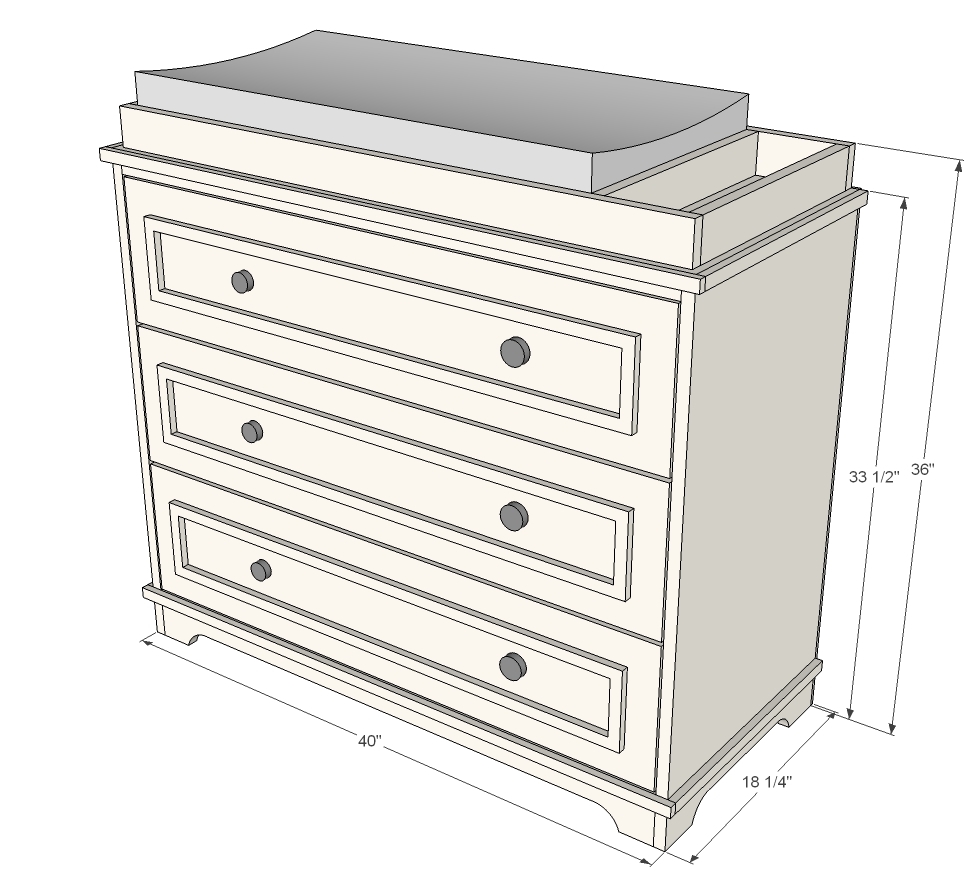
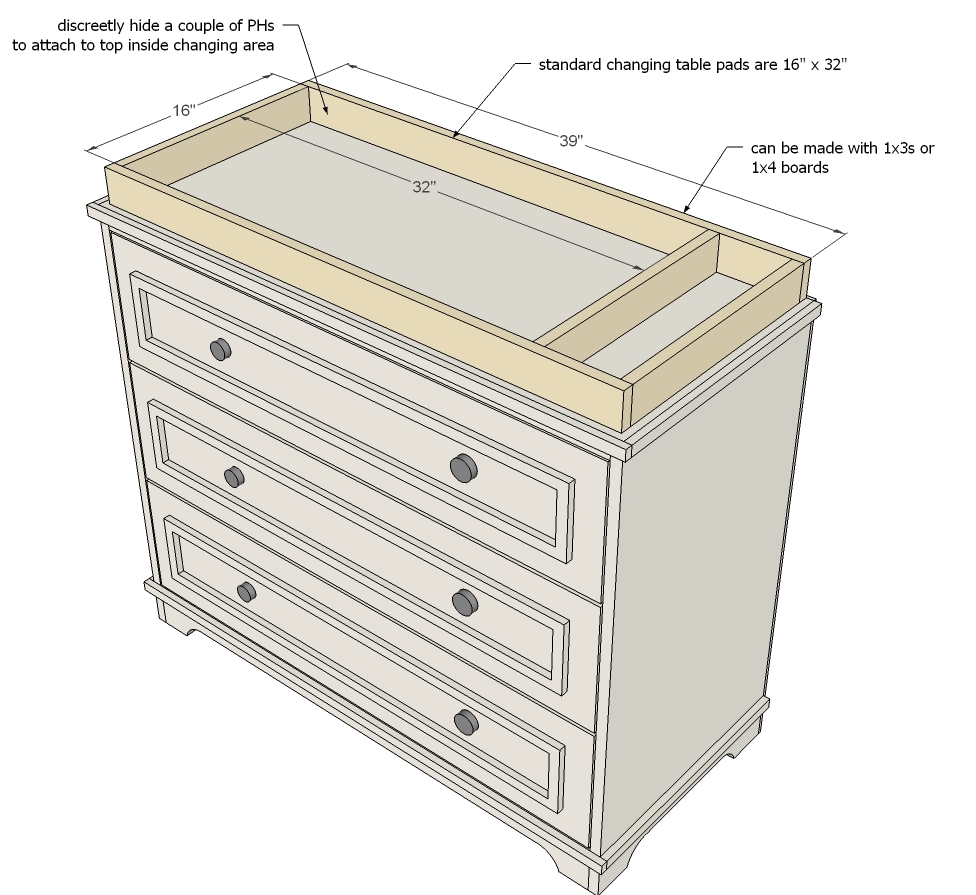
The topper is a piece of cake! Changing pads can vary in length, so make sure you build to suit your topper.
Original article and pictures take http://ana-white.com/2013/11/plans/fillman-dresser-or-changing-table site
Комментариев нет:
Отправить комментарий