Difficulty
Beginner
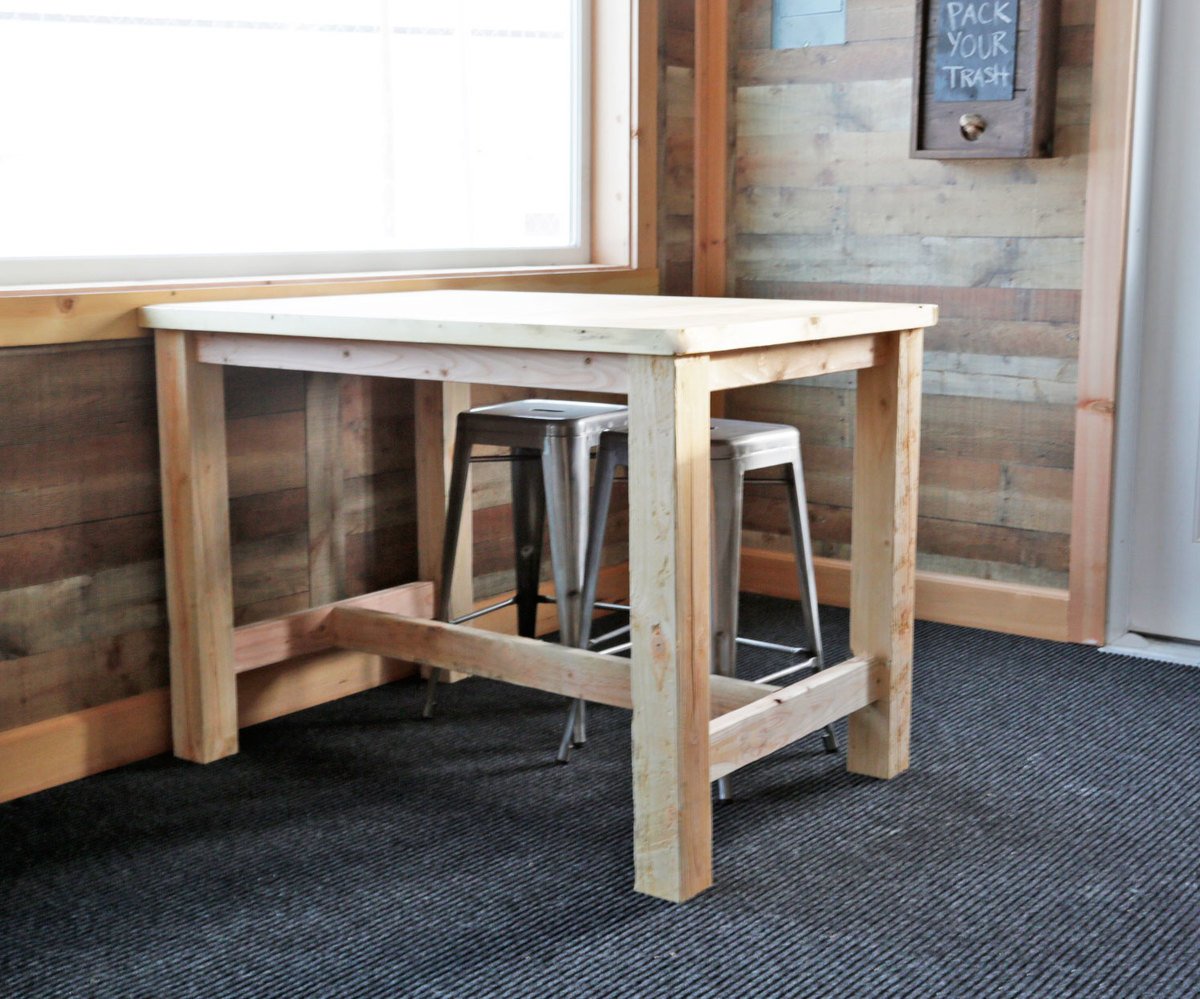
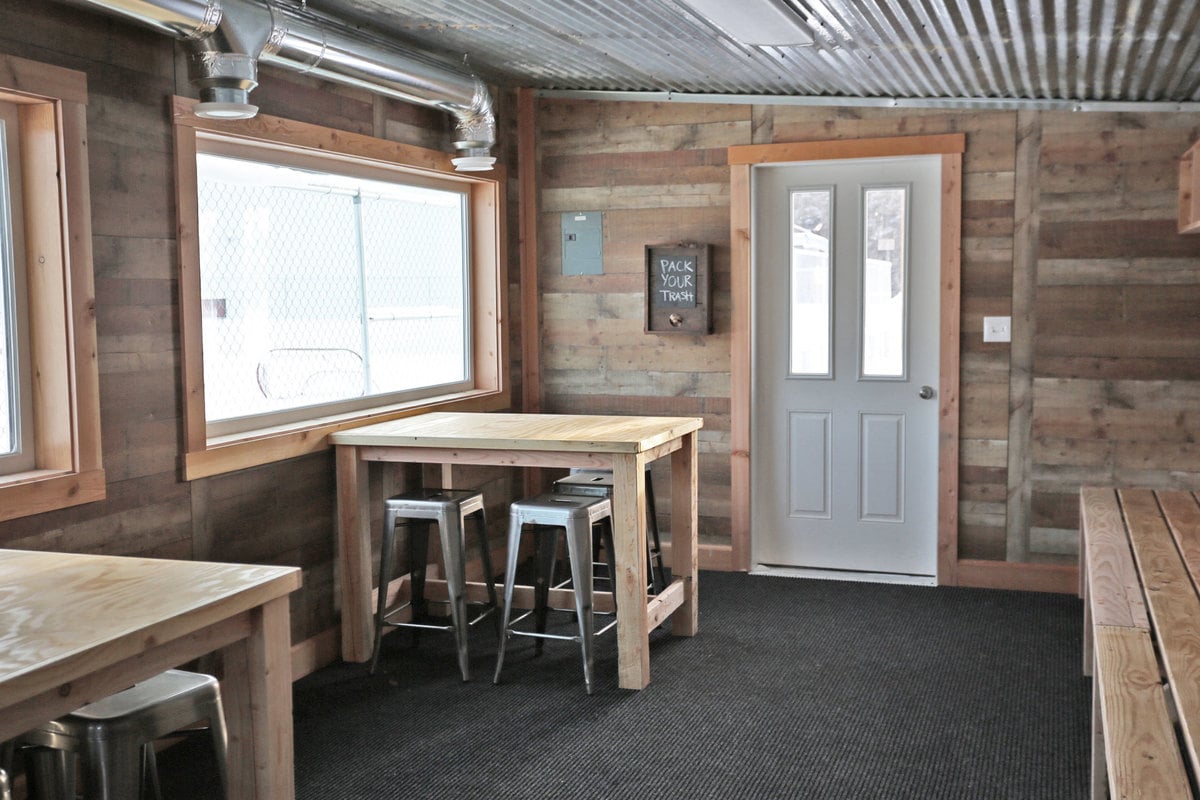
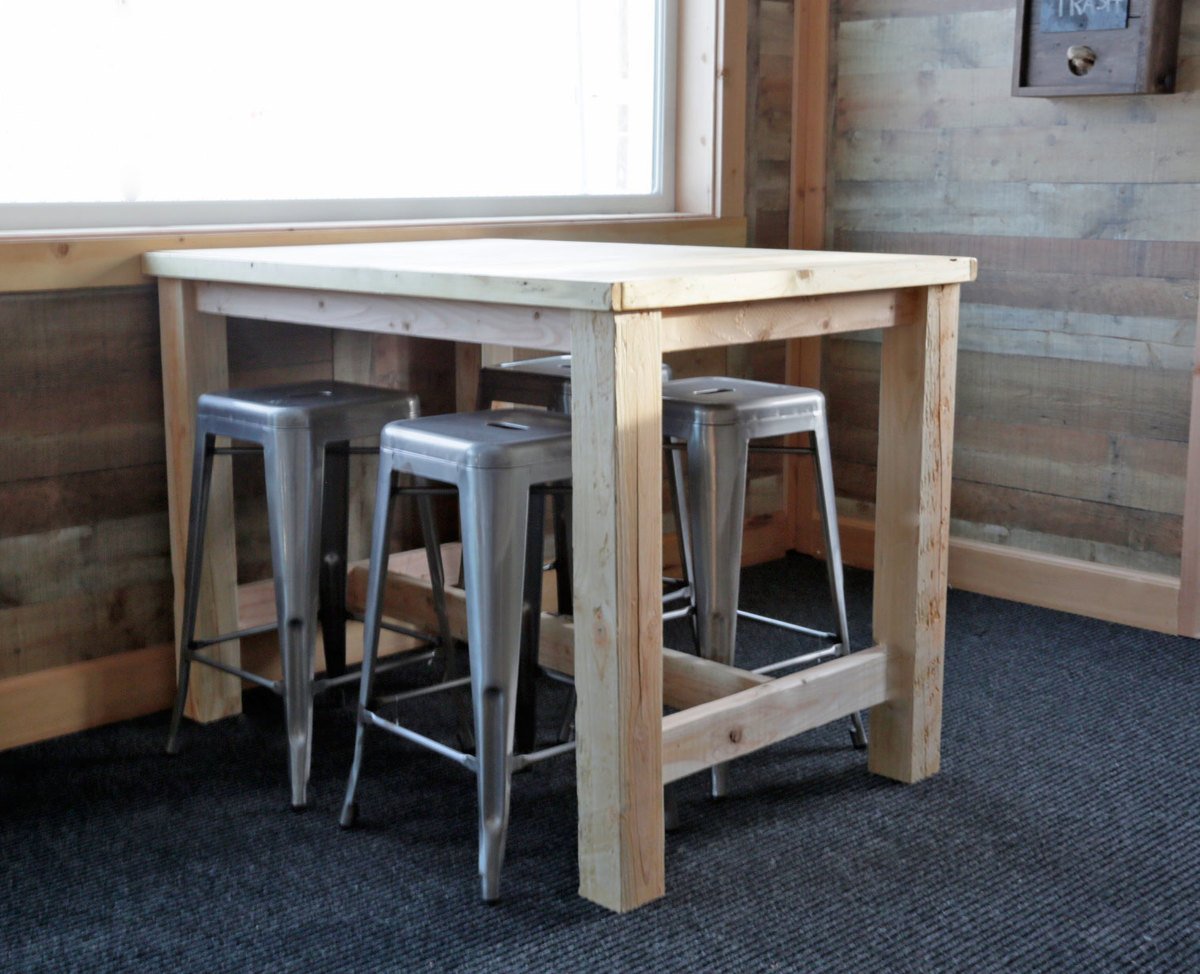
DIY Farmhouse Style Table Counter height with seating for four - free plans by ANA-WHITE.com
We just finished up a fun little project for our community! It's a ice skating warming hut nicknamed "The Skate Shack". It's placed right next to the rink, so skaters can come inside, put their gear on, go skate, come back in and warm up, keep skating, and so on. We are so excited about this addition to our community and grateful that we have this facility to use now.
This is a volunteer effort and there may not be maintenance or janitorial services provided by our local government, so we finished the interior of the skate shack with this in mind. Nothing painted white that will need touch up, and lots of very durable consturction wood that can take a beating (or look "weathered" and more beautiful as it's used).
The furnishings especially I wanted to be very durable, and designed to age well. You know, like an old picnic table that just gets more beautiful each time it's used.
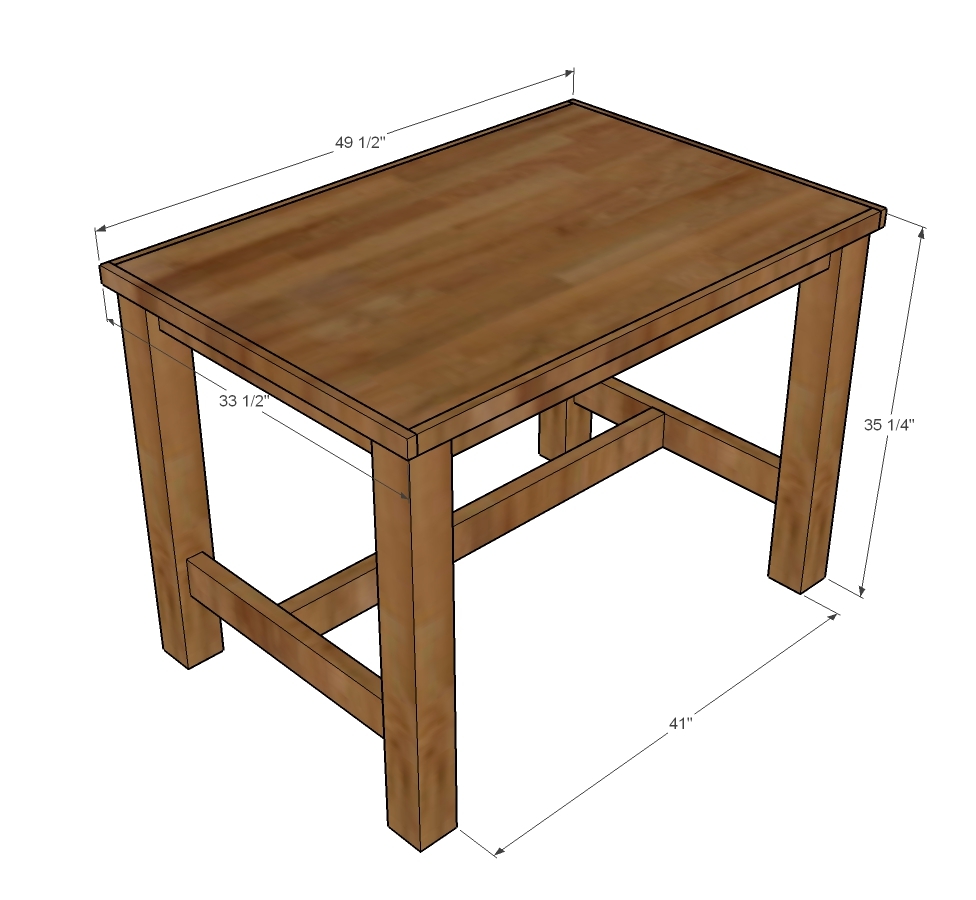
For the table seating, we built these counter height tables made of 4x4s and 2x4s. The tops are 3/4" thick plywood.
I love how they turned out, and the size is just right. I could also see these counter height tables being used as a kitchen island or even a project table (especially with the smooth plywood top).
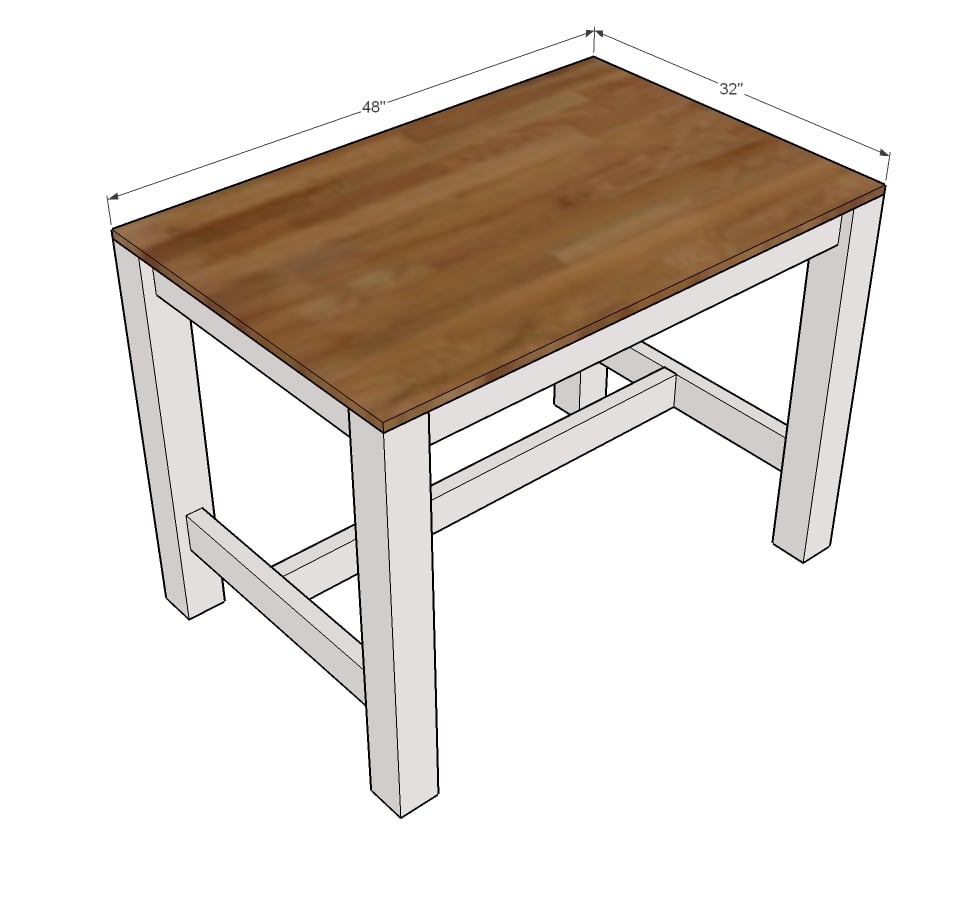
Speaking of sizing, we made the tops 48" x 32" - so you can get three tabletops out of one sheet of plywood. But of course, you can alter the size - just consider that 3/4" plywood max span is about 3 feet for shelving/furniture, so if you go bigger, you may need to throw some 2x4 supports between the aprons - but no biggie!
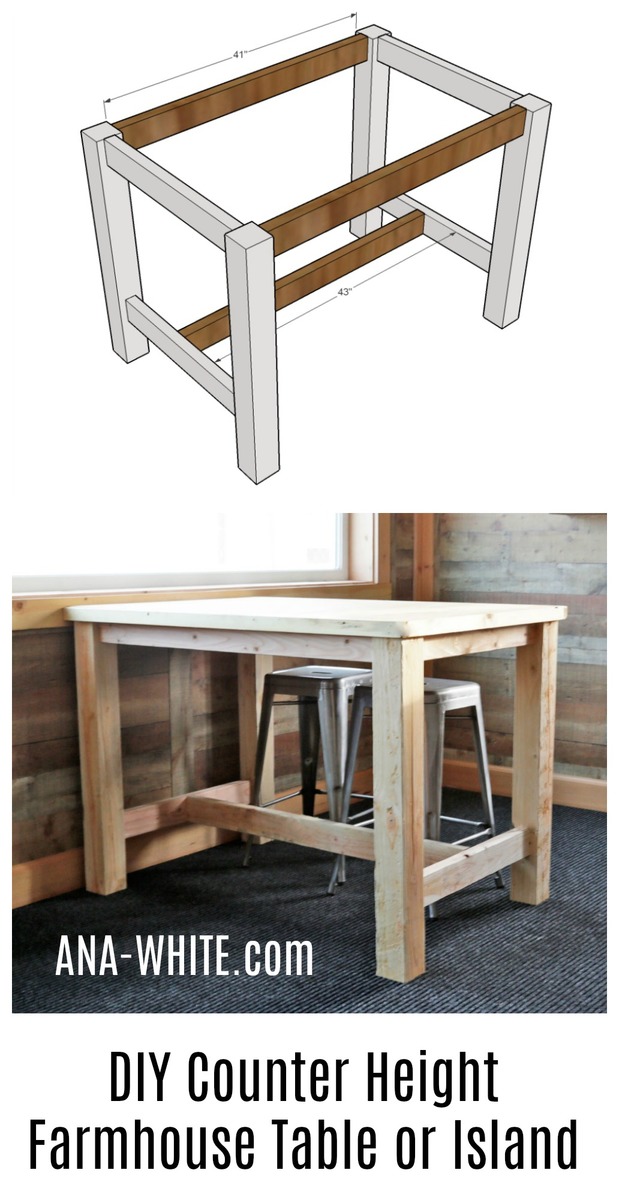
The free plans follow, please do share if you build, we love seeing your projects!
XO Ana
PS - You can watch our video series on build The Skate Shack here.
Preparation
4 - 4x4 @ 34-1/2"
4 - 2x4 @ 25"
2 - 2x4 @ 41"
1 - 2x4 @ 43"
1 - plywood panel @ 48" x 32"
2 - 1x2 @ 48"
2 - 1x2 @ 33-1/2" - cut these guys to fit
Instructions
Step 1
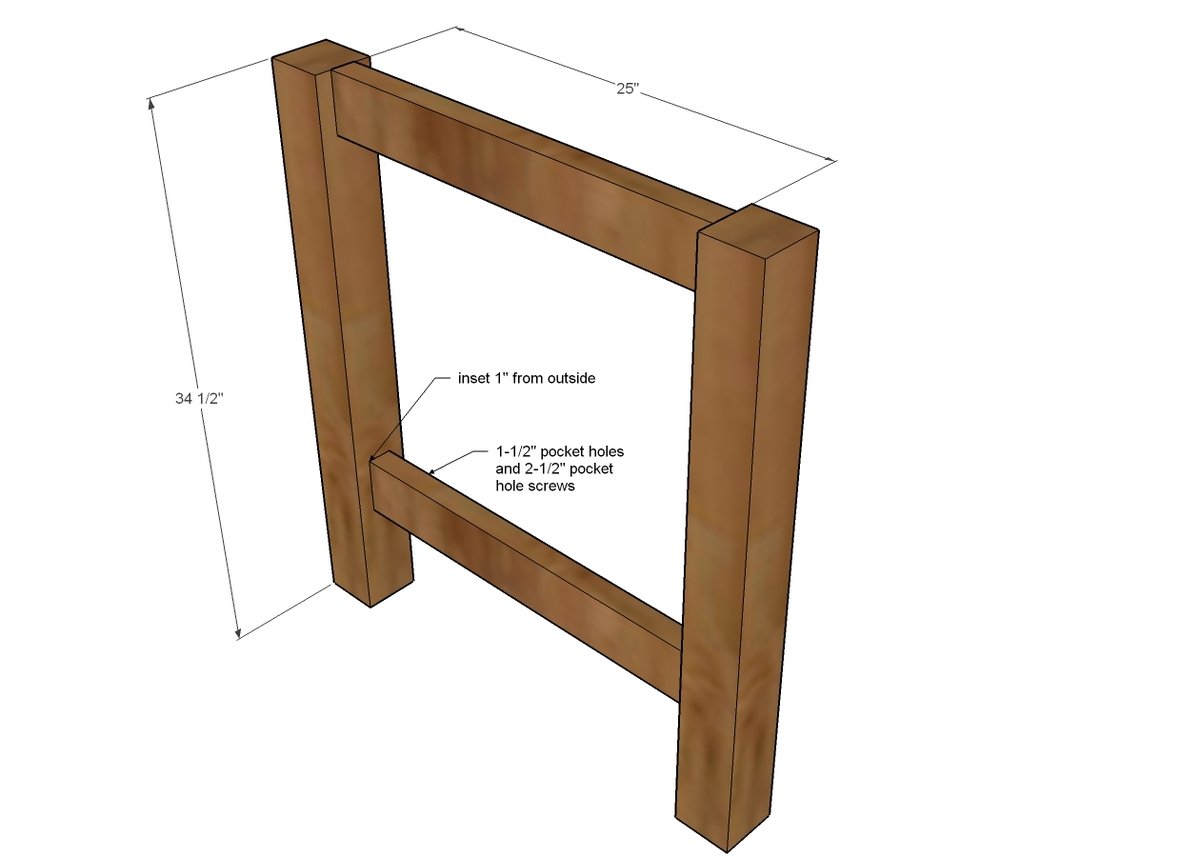
Drill two 1-1/2" pocket holes on each end of the 25" long 2x4s.
Attach to the 4x4 legs, inset 1".
I placed mine with a 6" clearance underneath the bottom 2x4.
Build two.
Step 2
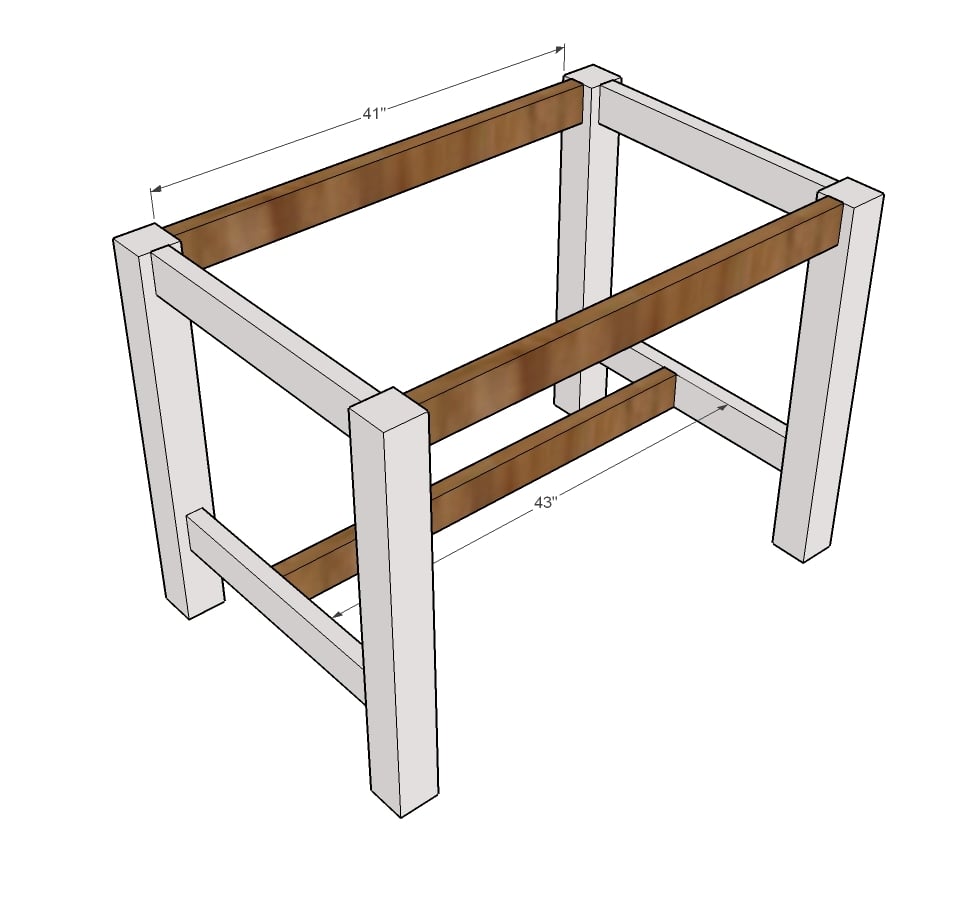
Drill two 1-1/2" pocket holes on each end of the 41" long 2x4s. Attach at top of leg sets, inset 1".
You can repeat for middle bottom 2x4 or use 3" self tapping screws instead of pocket holes. Center bottom stretcher.
Step 3
Apply glue to top edge and nail plywood panel to legs and aprons with 2" nails.
Step 4
Apply glue to long edges of plywood and top 3/4" of 4x4 legs. Nail on 48" 1x2s to plywood and 4x4 leg tops.

Step 5
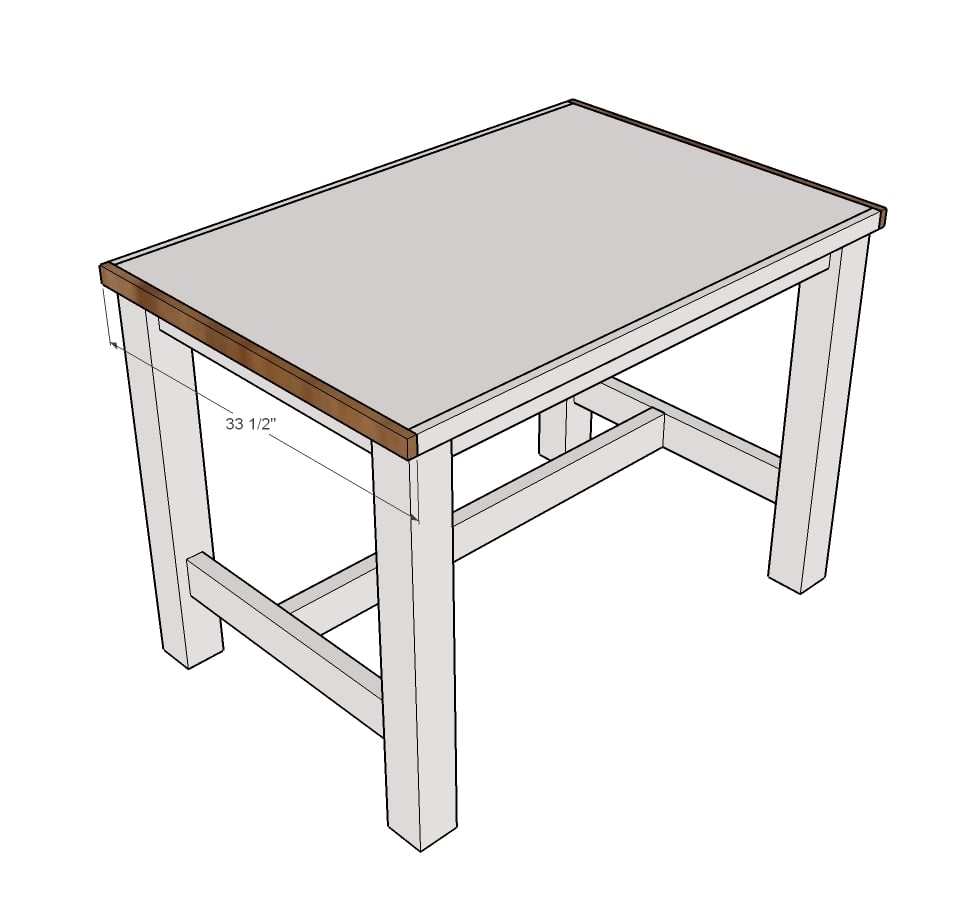
Original article and pictures take http://www.ana-white.com/2018/02/free_plans/counter-height-farmhouse-table-four site
Комментариев нет:
Отправить комментарий